The following are step-by-step instructions for onboarding your Android Phone to hosted Netwindy email services. For new accounts, please reach out to Netwindy support for access credentials and server-specific information.
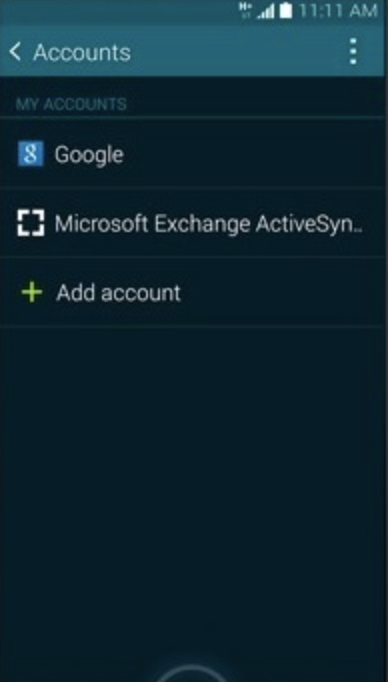
1.) On your Android phone go to “Apps > Settings > Accounts > Add Account”, choose “Microsoft Exchange ActiveSync”.
2.) Enter your email address and password then select “Next”.
Enter your email address and leave the domain field blank. Enter the server name then slect “Next”. All customer email with LunarWeb is configured for Auto Discovery. If Auto Discovery fails please contact customer support to identify what server your company is provisioned to.
3.) Activation banner, please choose “Ok”.
4.) Remote security administration, please choose “Ok”
Scroll down, some options will be pre-selected. You can change any of the displayed options before proceeding, please choose “Next”
5.) Choose “Activate”
Edit the Account Name if desired, please choose “Done”
The email account has been added. To view the email account, press “Home”
—
For additional setup options please refer to Google Android support and documentation article 6316959:
https://support.google.com/accounts/answer/6316959?hl=en&co=GENIE.Platform%3DAndroid